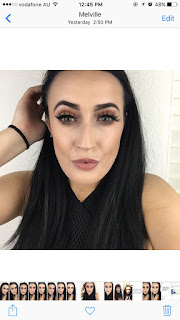
How i edit my Instagram pictures.
How to get the perfect Instagram selfie.
In today's blog post i am going to talk about how to edit a 'Makeup Selfie'. I only use two apps to edit my pictures. Most of the editing i do is in the Instagram app itself. The other app i use is Face tune. However facetune you do have to pay to download the app. The app is $4 from the appstore, and it will be the BEST $4 you will ever spend.
In this blog post i am going too show you how i edit my pictures in detail so you can get your pictures looking nice, clear and clean. Because nobody wants a dark picture.
Step 1: Choosing your favourites.
After taking all your pictures on your camera. Go to camera roll on your phone then choose your favourites. If you have a Iphone under your picture you will see a little love heart, Looking like this
♡ once you have select that icon it will turn into a heart like this ♥ that means that you have selected your favourite. Selecting your favourites will make the progress alot easier when your about to edit your pictures. It should look alot like this.
 |
| Favourites folder looks like this. ( In Camera Roll ) |
step 2: Open Facetune.
Once you have selected your favourites. Open up facetune.
 |
| Select the Camera in the left hand corner too import your picture you want to edit. |
At the bottom of the app you will see all the tools which you can edit your pictures with.
Open up 'Smooth' too smooth out any lines or blemishes you do not like (you do not have to remove anything if you are happy with it. This is just the way I like to edit my pictures. Once you have select smooth remove anything you do not like. Once you finished smoothing out the areas you do not like press the blue tick too save your editing.
 |
| Once you press smooth just drag your finger over the area you want to smooth out. |
 |
| after all the lines are gone. |
Step 3: Open up Instagram
Brightness:
I'm sure you all have seen how to edit a picture in instagram. but nobody likes a dark, shadows or grainy picture. Open up brightness and drag the tool up to 17. If that is too bright for your picture then bring it up to whatever suits.
Contrast:
Open up contrast. Bring contrast around 7-10 again depending on your picture you do not want to over edit. Make sure all your editing is natural as possibly.
Highlights:
Bring highlights down to around 2-4.
Shadows:
bring shadows down to 2-4 same as highlights.
Sharpen:
Now this is by far my favourite tool in Instagram. You do not need a fancy camera too have a clear picture. All you really need is this tool. Bring the sharpen tool up too 30. And wallah. It looks like it's been taken on a REALLY good camera.
I have attached some pictures of how to do it. if you're getting confused. This way is simple and easy.


Comments
Post a Comment